The colour wheel is fun! I highly recommend putting aside an hour, getting your paints out and creating one yourself. It will help you to really connect with and understand the mixing of colours and how they work together. And it is a great way to spend a meditative, creative hour. It’s also a great activity to do with kids. Below are the instructions on how to create a colour wheel. Note that the aim of the colour wheel is to get an even flow of colour around the circle.
Painting the colour wheel
- Take out your Red, Blue and Yellow paint pots. These are your three Primary colours.
- Put a dollop of each colour at 3 equidistant points on your pallette.
- With a moistened brush, paint one colour in any one segment of your choice.
- Count 3 spaces after your first painted segment, and then paint the FOURTH segment in another Primary colour.
- Count another 3 spaces on and then paint the FOURTH segment in the third Primary colour. You should now have 3 segments painted in different colours spaced equally around your wheel.
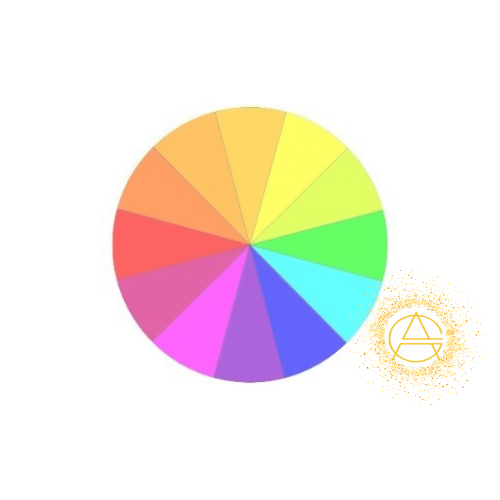
- On your pallette between Red and Yellow mix Orange, a Secondary colour. To get a true Orange you will need more Yellow than Red. Paint the middle segment between Yellow and Red with this Orange. Then paint a Yellow/Orange in the segment closest to the Yellow segment, and a Red/Orange in the segment closest to the Red segment.
- Do the same for Yellow and Blue. In between these colours on your pallette mix Yellow with Blue to create Green. Paint the Green in the middle segment between Yellow and Blue. Then paint a Yellow/Green and a Blue/Green.
- The last step is to mix Purple. Mix even strengths of Red and Blue. Paint this Purple in the middle segment between the two. Then paint a Red/Purple and finally a Blue/Purple.
I’d love to hear how you got on with your colour wheel, and to see pics! Leave me a comment below or post a pic on social media and tag me.